
Desserts
Caramel Bars Delight: Irresistibly Gooey Treats You Must Try!
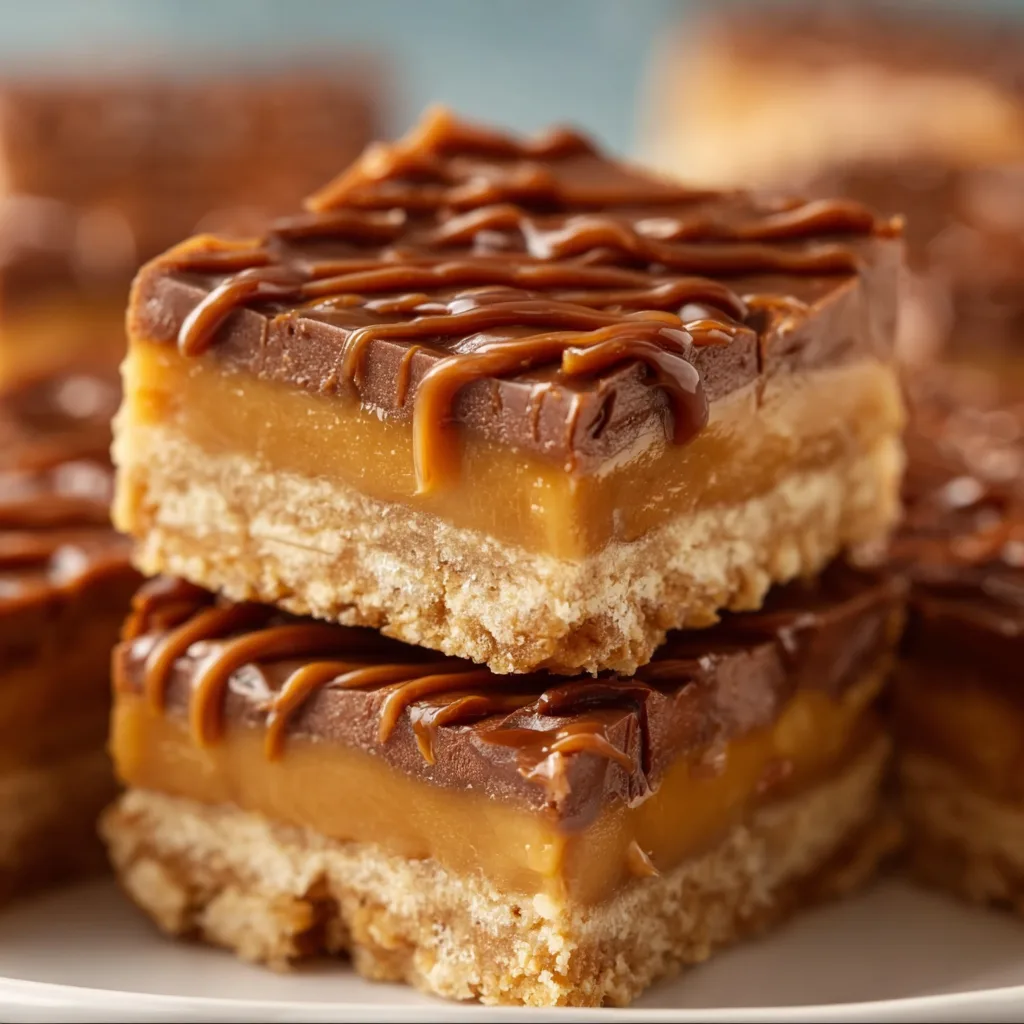
Caramel Bars have been my secret weapon for years when I need a dessert that makes everyone’s eyes light up. These buttery, gooey treats strike the perfect balance between a cookie and a candy, with layers of rich caramel nestled between shortbread and a crumbly topping. I first made these for a neighborhood potluck where they disappeared faster than anything else on the table! The combination of textures—crisp, chewy, and melt-in-your-mouth—creates an irresistible treat that’s surprisingly simple to prepare. Let me show you how to make caramel bars that will have everyone begging for the recipe.
Recipe
Why You’ll Love These Caramel Bars
Perfect Balance of Flavors and Textures
These caramel bars deliver the most satisfying contrast between buttery shortbread and sticky-sweet caramel. The shortbread base provides a sturdy foundation while remaining tender and crumbly. When you bite into one, you first encounter that slight resistance before sinking into the gooey caramel layer that coats your palate with deep, brown sugar notes. I love watching friends take their first bite—there’s always that moment of wide-eyed surprise followed by an appreciative “mmm” that tells me they’ve discovered something special. The textural contrast is what makes these bars memorable.
Make-Ahead Convenience
One of my favorite things about these caramel bars is how beautifully they hold up over time. I can make them a day or two before a gathering, which is a lifesaver during busy weeks. The caramel filling actually benefits from setting up overnight, becoming more flavorful as the ingredients meld together. Last Christmas, I prepared these three days ahead for a family gathering, and they were still perfectly fresh and delicious when served. They also freeze beautifully for up to three months, making them perfect for emergency dessert stashes or when you need a quick homemade gift for unexpected visitors.
Essential Tips & Tricks
Perfecting the Caramel Layer
Getting the caramel just right is crucial for these bars. I’ve learned through many batches that patience is key—low and steady heat prevents burning and creates that perfect amber color. When melting your caramel ingredients, use a heavy-bottomed saucepan and stir constantly. Watch for the moment it thickens and pulls slightly away from the sides of the pan. This usually takes about 6-7 minutes. The caramel should coat the back of a spoon but still pour easily. If it gets too thick, add a tablespoon of cream. I once rushed this step and ended up with grainy caramel—trust me, the extra few minutes of attention makes all the difference!
Preventing Common Mistakes
The most frequent issue I see with caramel bars is an overbaked shortbread base. For the perfect texture, bake the base just until it’s barely golden at the edges—about 15-18 minutes. Another trick is to let the base cool slightly before adding the caramel layer, which prevents the shortbread from becoming soggy. For clean-cut squares, completely cool your bars before slicing. I recommend refrigerating them for at least 2 hours, then using a sharp knife dipped in hot water and wiped clean between cuts. This simple step gives you those picture-perfect edges that make these bars look as professional as they taste.
Serving Ideas & Creative Variations
Elevate Your Presentation
Transform these caramel bars from casual treat to elegant dessert with thoughtful presentation. Serve them on a wooden board with fresh berries for a rustic charm that’s perfect for gatherings. For individual servings, cut smaller pieces and place each on a decorative cupcake liner. I love drizzling extra caramel sauce in a zigzag pattern across the serving plate, then adding a light dusting of flaky sea salt just before serving. For holiday gatherings, I arrange them on a tiered stand with other classic treats like peanut butter cookie bars. The visual impact always draws guests in, and the flavor keeps them coming back!
Exciting Flavor Twists
While traditional caramel bars are divine, experimenting with flavors takes them to new heights. Try adding a teaspoon of espresso powder to the caramel for a mocha variation that coffee lovers adore. For fall gatherings, I incorporate apple by folding in 1/2 cup of finely diced sautéed apples to the caramel layer. Chocolate lovers can add a layer of melted dark chocolate on top of the cooled caramel before adding the crumble topping. My personal favorite variation includes toasted pecans in the topping for extra crunch and a nutty dimension that complements the sweet caramel perfectly.
Storage & Troubleshooting Guide
Keeping Bars Fresh
Proper storage ensures your caramel bars maintain their perfect texture for days. Store them in an airtight container at room temperature for up to 3 days, with parchment paper between layers to prevent sticking. In warmer weather, refrigeration is best—they’ll last up to a week. Just let them come to room temperature before serving for the best flavor and texture. For longer storage, wrap individual bars in plastic wrap, then place in a freezer bag. They’ll keep for 3 months frozen. I always make a double batch specifically to freeze some for future cravings—there’s nothing better than discovering these treasures in your freezer on a day you need something sweet!
Fixing Common Issues
Even experienced bakers encounter challenges with caramel bars. If your caramel layer turns out too hard, it was likely cooked at too high a temperature or for too long. Next time, reduce the heat and cooking time by 1-2 minutes. For caramel that’s too soft, it needs more cooking time or cooling time. If your shortbread base crumbles when cutting, it might have been too dry—add an extra tablespoon of butter to the base next time. For bars that stick to the pan, line it with parchment paper with overhang on all sides to create handles for easy removal.
Frequently Asked Questions
Can I make caramel bars without a candy thermometer?
Absolutely! Watch for visual cues instead—the caramel should be amber-colored and coat the back of a spoon. When you drag a spatula through it, it should leave a trail that slowly fills back in.
How do I know when my caramel bars are done baking?
The topping should be light golden brown, and the caramel might bubble slightly at the edges. Don’t overbake—they’ll continue to set as they cool.
Why did my caramel crystallize?
Crystallization happens when sugar crystals form. Avoid this by not stirring once the sugar dissolves, keeping the pan sides clean, and adding a teaspoon of corn syrup.
Can I use store-bought caramel for these bars?
You can, but homemade caramel provides better flavor and texture. If using store-bought, choose a high-quality caramel sauce and reduce it slightly for thickness.
How do I cut caramel bars cleanly without making a mess?
Refrigerate the bars until firm, then use a hot knife (run under hot water and dry) for each cut. Clean the knife between slices for perfect presentation.
Final Thoughts
These caramel bars have become my signature dessert for good reason—they strike that perfect balance between impressive and achievable. The buttery shortbread, gooey caramel, and crumbly topping create a treat that’s greater than the sum of its parts. I hope you’ll try these caramel bars and experience the joy they bring to both the baker and those lucky enough to enjoy them. Remember, baking is about sharing love, and these bars communicate that beautifully. Find more inspiration for your baking adventures on Pinterest!