
Pumpkin Recipes

5 Pumpkin Pie Crisp Recipes Everyone Will Love

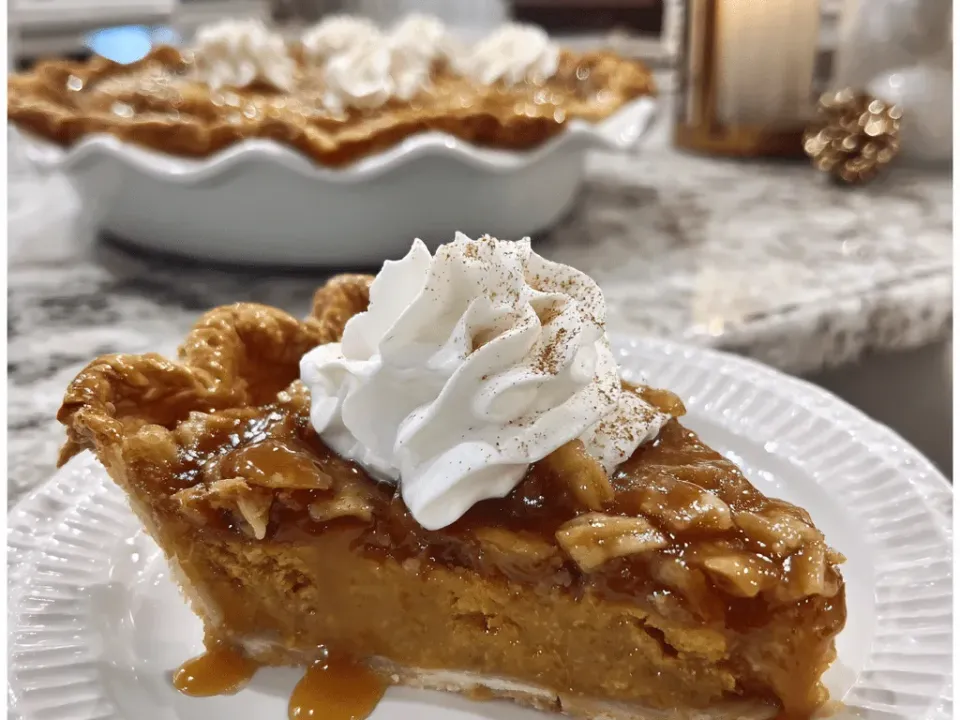
Pumpkin pie crisp in a glass baking dish with golden oat topping.

5 Pumpkin Pie Crisp Recipes Everyone Will Love

Ingredients

For the Filling

  • Pumpkin butter – My secret weapon. Homemade or store-bought works, but homemade makes it extra special.
  • Eggs – For structure, so the filling sets like a custard.
  • Evaporated milk or heavy cream – Adds richness and a smooth texture.

For the Crisp Topping

  • Old-fashioned oats – The heart of that crumbly, chewy crisp.
  • All-purpose flour – Helps bind the topping so it stays together.
  • Brown sugar – For sweetness and that hint of molasses.
  • Cold butter, cubed – The magic that makes the topping golden and crisp.
  • Cinnamon – Because you can never have too much warm spice in a fall dessert.
  • Pinch of salt – Just enough to make every flavor pop.

Tips for the Best Pumpkin Pie Crisp

  • Cold butter is your friend – It’s the secret to a topping that stays crunchy and crumbly. Warm butter will melt into the oats and flour too quickly, giving you a flat, less satisfying crisp.
  • Let it rest before serving – The pumpkin filling sets as it cools, making it easier to scoop and keeping the layers distinct.
  • Glass baking dishes work wonders – You can see when the edges of your pumpkin pie crisp are perfectly toasted, plus they help it bake evenly.
  • Don’t skimp on spice – Pumpkin pie crisp shines when the cinnamon, cloves, and nutmeg are bold enough to stand up to the sweet pumpkin layer.

Variations to Keep Pumpkin Pie Crisp Exciting

  • Nut Lover’s Pumpkin Pie Crisp – Sprinkle chopped pecans or walnuts into the topping for extra crunch and a rich, toasty flavor.
  • Gluten-Free Pumpkin Pie Crisp – Swap almond flour or certified gluten-free oat flour for the all-purpose flour in the topping.
  • Maple Pumpkin Pie Crisp – Drizzle pure maple syrup over the topping before baking for an added layer of sweetness and autumn aroma.
  • Savory-Sweet Pumpkin Pie Crisp – Pair the dessert with roasted turkey or pork for a surprising, crowd-pleasing side.

Serving Ideas That Make Pumpkin Pie Crisp Even Better

  • Classic & Cozy – Serve your pumpkin pie crisp warm with vanilla ice cream melting over the top.
  • Morning Treat – Cold pumpkin pie crisp with Greek yogurt is basically breakfast disguised as dessert.
  • Holiday Showstopper – Dress up each serving with candied pecans, a swirl of whipped cream, and a sprinkle of cinnamon sugar.

Instructions

  1. Preheat the oven – Set it to 350°F (175°C). Grease a 9×9-inch baking dish.
  2. Mix the filling – In a medium bowl, whisk together the pumpkin butter, eggs, and evaporated milk until it’s smooth and creamy. This step always makes me want to grab a spoon right there.
  3. Pour and smooth – Spread the filling evenly into your prepared baking dish.
  4. Make the topping – In another bowl, combine the oats, flour, brown sugar, cinnamon, and salt. Add the cold butter cubes and cut them in with a pastry cutter (or your fingertips) until the mixture looks like coarse crumbs.
  5. Assemble – Sprinkle that buttery crumble evenly over the pumpkin layer.
  6. Bake – Slide it into the oven and bake for 40–45 minutes, until the topping is golden and the filling is set around the edges.
  7. Serve – Warm is best, with a scoop of vanilla ice cream or a dollop of whipped cream melting on top.

Pumpkin pie crisp wasn’t something I grew up eating. We were a “pumpkin pie at Thanksgiving” family, and that was that. But one hectic fall afternoon, with three kids buzzing around and zero interest in rolling pie dough, I discovered this little game-changer. I had a jar of my homemade pumpkin butter on the counter, oats in the pantry, and a crisp topping idea in my head. Forty-five minutes later, the house smelled like a pumpkin spice dream and my kids were standing over the oven asking if it was ready yet. That was the day pumpkin pie crisp became a family tradition.

Table of Contents

Recipe

Why Pumpkin Pie Crisp Deserves a Spot at Your Table

The Shortcut That Changed My Fall Baking

The first time I made pumpkin pie crisp, it was purely out of desperation. It was one of those chaotic days — homework battles at the table, laundry mountain in the corner, and me standing in the kitchen realizing I’d promised dessert for dinner guests.

A pie crust was not happening. But I had pumpkin butter, oats, brown sugar, and butter. I thought, “What if pumpkin pie had a cousin that didn’t need a crust?” That night, pumpkin pie crisp was born — creamy, spiced pumpkin filling under a crunchy, buttery topping. No rolling pins. No stress. Just pure fall comfort.

Pumpkin Butter: The Flavor Upgrade

Here’s the secret — pumpkin butter takes this crisp from good to unforgettable. It’s already packed with cinnamon, cloves, nutmeg, and just the right sweetness. By starting with pumpkin butter instead of plain puree, you skip extra steps and still get a rich, caramelized depth of flavor. It’s my shortcut to instant cozy.

Ingredients You’ll Need

When I’m making pumpkin pie crisp, I think of it in two parts — the silky pumpkin layer and the golden, crumbly topping. Both come together with pantry basics, which means you can whip this up whenever the craving hits.

Ingredients for pumpkin pie crisp laid out on a wooden table.

For the Filling

  • Pumpkin butter – My secret weapon. Homemade or store-bought works, but homemade makes it extra special.
  • Eggs – For structure, so the filling sets like a custard.
  • Evaporated milk or heavy cream – Adds richness and a smooth texture.

For the Crisp Topping

  • Old-fashioned oats – The heart of that crumbly, chewy crisp.
  • All-purpose flour – Helps bind the topping so it stays together.
  • Brown sugar – For sweetness and that hint of molasses.
  • Cold butter, cubed – The magic that makes the topping golden and crisp.
  • Cinnamon – Because you can never have too much warm spice in a fall dessert.
  • Pinch of salt – Just enough to make every flavor pop.

With this lineup, you’re minutes away from a dessert that feels special but is secretly simple — exactly how I like to bake on busy days.

Step-by-Step Instructions

I always say that pumpkin pie crisp is one of those desserts that makes your kitchen smell like you’ve been baking all day — when really, you’ve only spent ten minutes putting it together. Here’s how it goes:

  1. Preheat the oven – Set it to 350°F (175°C). Grease a 9×9-inch baking dish.
  2. Mix the filling – In a medium bowl, whisk together the pumpkin butter, eggs, and evaporated milk until it’s smooth and creamy. This step always makes me want to grab a spoon right there.
  3. Pour and smooth – Spread the filling evenly into your prepared baking dish.
  4. Make the topping – In another bowl, combine the oats, flour, brown sugar, cinnamon, and salt. Add the cold butter cubes and cut them in with a pastry cutter (or your fingertips) until the mixture looks like coarse crumbs.
  5. Assemble – Sprinkle that buttery crumble evenly over the pumpkin layer.
  6. Bake – Slide it into the oven and bake for 40–45 minutes, until the topping is golden and the filling is set around the edges.
  7. Serve – Warm is best, with a scoop of vanilla ice cream or a dollop of whipped cream melting on top.

By the time you open the oven door, the cinnamon-scented air will have drawn everyone into the kitchen like moths to a flame.

Tips, Variations & My Favorite Serving Ideas

The beauty of a good pumpkin pie crisp is that it’s both forgiving and endlessly adaptable. Once you’ve made the basic recipe, you can start adding your own twists to make it perfect for your table. Here’s how I keep my pumpkin pie crisp turning out golden, flavorful, and irresistible every time.

Tips for the Best Pumpkin Pie Crisp

  • Cold butter is your friend – It’s the secret to a topping that stays crunchy and crumbly. Warm butter will melt into the oats and flour too quickly, giving you a flat, less satisfying crisp.
  • Let it rest before serving – The pumpkin filling sets as it cools, making it easier to scoop and keeping the layers distinct.
  • Glass baking dishes work wonders – You can see when the edges of your pumpkin pie crisp are perfectly toasted, plus they help it bake evenly.
  • Don’t skimp on spice – Pumpkin pie crisp shines when the cinnamon, cloves, and nutmeg are bold enough to stand up to the sweet pumpkin layer.

Variations to Keep Pumpkin Pie Crisp Exciting

  • Nut Lover’s Pumpkin Pie Crisp – Sprinkle chopped pecans or walnuts into the topping for extra crunch and a rich, toasty flavor.
  • Gluten-Free Pumpkin Pie Crisp – Swap almond flour or certified gluten-free oat flour for the all-purpose flour in the topping.
  • Maple Pumpkin Pie Crisp – Drizzle pure maple syrup over the topping before baking for an added layer of sweetness and autumn aroma.
  • Savory-Sweet Pumpkin Pie Crisp – Pair the dessert with roasted turkey or pork for a surprising, crowd-pleasing side.

Serving Ideas That Make Pumpkin Pie Crisp Even Better

  • Classic & Cozy – Serve your pumpkin pie crisp warm with vanilla ice cream melting over the top.
  • Morning Treat – Cold pumpkin pie crisp with Greek yogurt is basically breakfast disguised as dessert.
  • Holiday Showstopper – Dress up each serving with candied pecans, a swirl of whipped cream, and a sprinkle of cinnamon sugar.

Whether you’re serving it for Thanksgiving, a cozy fall dinner, or just because the air smells like cinnamon outside, pumpkin pie crisp will always find a way to steal the spotlight. And with these tips and variations, it’ll taste just as amazing the tenth time you make it as it did the first.

5 Pumpkin Pie Crisp Recipes Everyone Will Love

When I made my first crisp, I thought there was only one way to do it — silky pumpkin filling, buttery topping, end of story. But over the years, I started experimenting. A sprinkle of nuts here, a swirl of chocolate there, and suddenly I had five versions that my family requests all season long.

1. The Classic

The original that started it all — smooth spiced pumpkin butter base with a golden, crumbly oat topping. Best served warm with a scoop of vanilla ice cream.

2. Maple Pecan

Nutty and sweet, this one is perfect for holidays. Stir ½ cup chopped pecans into the topping, then drizzle on 2 tablespoons maple syrup before baking.

3. Apple Cinnamon

A cozy mash-up of two fall favorites. Layer thin slices of apple between the filling and topping for extra texture and a hint of tartness.

4. Chocolate Swirl

For chocolate lovers, melt ½ cup semi-sweet chips and swirl them into the filling before adding the topping.

5. Savory-Sweet

Reduce the sugar in the topping by one-third and stir in a teaspoon of fresh rosemary. Surprisingly good alongside roasted pork or turkey.

Each one keeps that comforting mix of creamy filling and crisp topping, but with its own personality — so you can choose your favorite or try them all.

Conclusion – The Dessert That Saves the Day

Pumpkin pie crisp is my go-to when I want pumpkin pie flavor without the crust drama. It’s quick to make, full of warm spices, and just as welcome at a Thanksgiving table as it is on a random Tuesday night. That first time I pulled it from the oven, the topping golden and the pumpkin filling bubbling gently underneath, I knew I’d found a keeper.

Now, I make it when I’m short on time but still want to wow — and I’ve yet to see anyone turn down a second helping.

If you’re ready for more cozy fall recipes, try my Slow Cooker Pumpkin Butter for the perfect base.

Try it, share it, and tag me on Facebook — I’d love to see your Pumpkin Pie Crisp creations! ????????

FAQ – Pumpkin Pie Crisp Edition

1. Can I use canned pumpkin puree instead of pumpkin butter?

Yes, but you’ll need to add sugar and spices — about ¾ cup sugar and 2 teaspoons pumpkin pie spice — to get the same flavor depth.

2. Can I make pumpkin pie crisp ahead of time?

Absolutely. Assemble the filling and topping separately, store them in the fridge, then combine and bake just before serving.

3. How do I store leftovers?

Keep in an airtight container in the fridge for up to 4 days. Reheat in the oven to keep the topping crisp.

4. Can I freeze it?

Yes — bake, cool completely, wrap tightly, and freeze for up to 3 months. Thaw in the fridge, then warm in the oven before serving.