
Desserts
Mini Andes Mint Chocolate Cheesecake That Will Melt Your Heart Instantly
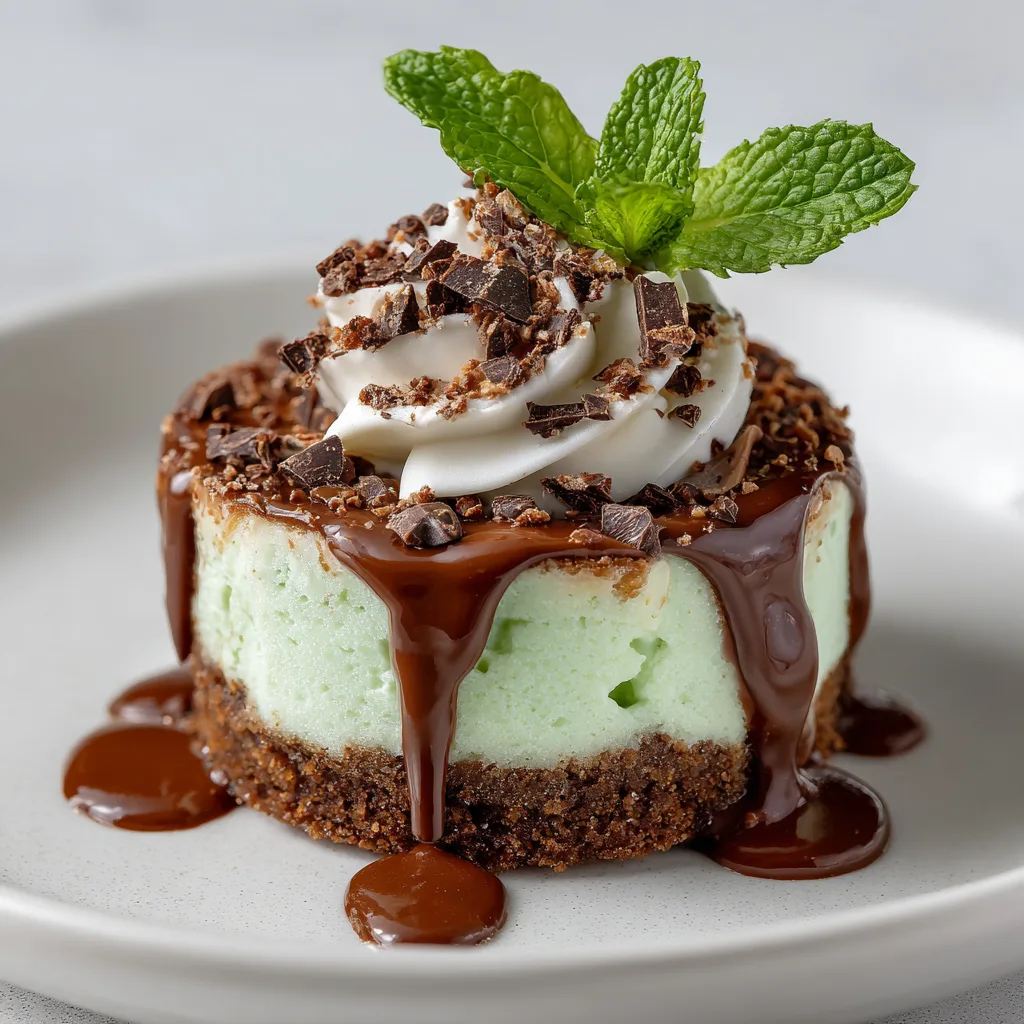
Mini Andes Mint Chocolate Cheesecake has become my absolute obsession this season! There’s something magical about that first bite—where the velvety chocolate meets cool mint in the creamiest cheesecake imaginable. I discovered this recipe during a holiday baking marathon with my sister, and we literally fought over the last mini cheesecake (she won, but only because I let her). These bite-sized treasures strike the perfect balance between rich chocolate intensity and refreshing mint, making them ideal for both elegant gatherings and midnight snacking sessions. Trust me, you’ll want to bookmark this page immediately!
Recipe
Why You’ll Love This Mini Andes Mint Chocolate Cheesecake
Perfect Portion Control with Maximum Flavor
These mini cheesecakes deliver all the indulgence of a full-sized dessert but in perfect, guilt-free portions. Each bite offers that satisfying contrast between the crunchy chocolate cookie base and the silky mint-infused filling. I love how the individual servings eliminate the messiness of cutting a traditional cheesecake—plus they’re absolutely adorable on a dessert platter! The Andes mints create these gorgeous swirls throughout that not only look stunning but deliver the most incredible chocolate-mint flavor that lingers pleasantly. These little treasures will have your guests thinking you spent hours in the kitchen (our little secret that they’re surprisingly simple).
Make-Ahead Convenience for Stress-Free Entertaining
One of my favorite aspects of these Mini Andes Mint Chocolate Cheesecakes is how beautifully they freeze and thaw. I’ve made them up to two weeks before a dinner party, and they taste just as fresh as the day I baked them! The texture remains perfectly creamy, and that mint flavor actually seems to develop more complexity over time. This make-ahead magic has saved me countless hours of last-minute party prep stress. Plus, there’s something incredibly satisfying about knowing you have a stash of these little treasures waiting in your freezer for unexpected guests or those emergency chocolate cravings that strike at 10 PM (we’ve all been there!).
Essential Tips & Tricks
Achieving the Perfect Texture
The secret to silky-smooth cheesecake is all in the room temperature ingredients. Cold cream cheese is the enemy of lump-free batter! I learned this the hard way after rushing through my first batch and ending up with tiny white specks throughout. Take the extra 30 minutes to let your cream cheese, eggs, and sour cream come to room temperature naturally. Another game-changer is using a water bath—even for minis! Simply place your muffin tin inside a larger baking pan with about an inch of hot water. This gentle, moist heat prevents cracking and creates that dreamy texture that melts in your mouth.
Perfecting the Mint-Chocolate Balance
Finding that ideal balance between mint and chocolate can be tricky—too much mint and you’re eating toothpaste, too little and you miss the point! I’ve discovered that finely chopped Andes mints work better than roughly broken pieces, creating an even distribution of flavor. For an extra mint boost without overwhelming the delicate cheesecake, add just ¼ teaspoon of mint extract to your batter. The chocolate cookie crust needs a pinch of salt to enhance the sweetness and complexity. My favorite hack: reserve some Andes pieces for garnishing right after baking while the cheesecakes are still warm—they’ll melt slightly on top, creating a beautiful marbled effect that’s both visually stunning and delicious.
Serving Ideas & Creative Variations
Elegant Presentation Techniques
Transform these mini treats into showstoppers with a few simple presentation tricks. My go-to method is placing each mini cheesecake on a small square of parchment paper with a tiny dollop of whipped cream and a fresh mint leaf. For special occasions, I dust the plates with cocoa powder using a small decorative stencil—it takes seconds but looks incredibly professional! Creating a dessert board with these minis as the centerpiece surrounded by chocolate-dipped strawberries and cinnamon sugar tortilla chips adds impressive variety. For holiday gatherings, arrange them on a tiered stand with fairy lights woven through—the soft glow makes the Andes mint pieces sparkle beautifully.
Seasonal and Dietary Adaptations
These versatile little cheesecakes can be easily customized for different occasions and dietary needs. For Christmas, I add crushed candy canes to the topping; for summer, fresh raspberries complement the mint perfectly. To create a gluten-free version, simply substitute the chocolate cookie crust with crushed gluten-free chocolate cookies or a mixture of almond flour, cocoa, and butter. For a lighter option, Greek yogurt can replace up to half the cream cheese without sacrificing that creamy texture. My lactose-intolerant friend adores the version I make with dairy-free cream cheese and coconut cream—she says it’s even better than the original! The recipe works beautifully with sugar substitutes like monk fruit for those watching their sugar intake.
Storage & Troubleshooting Guide
Optimal Storage Methods
Proper storage is essential for maintaining that perfect creamy texture we all crave in cheesecake. After cooling completely at room temperature, refrigerate uncovered for about an hour until the surface is no longer tacky. Then wrap each mini cheesecake individually in plastic wrap before placing them in an airtight container. This prevents them from absorbing other flavors in your refrigerator. They’ll keep beautifully for up to 5 days refrigerated, though I doubt they’ll last that long! For longer storage, freeze the wrapped cheesecakes for up to 2 months. The key to thawing is patience—transfer from freezer to refrigerator for 3-4 hours, then allow 20 minutes at room temperature for the perfect texture.
Troubleshooting Common Issues
Even experienced bakers encounter occasional challenges with cheesecakes. If your minis develop cracks, it’s likely due to overmixing (which incorporates too much air) or sudden temperature changes. Mix on low speed just until ingredients are combined, and always cool gradually in the oven with the door slightly ajar. For sunken centers, the culprit is usually underbaking—mini cheesecakes should still have a slight jiggle in the center when removed from the oven. If your crust turns out soggy, try pre-baking it for 5 minutes before adding the filling. And if the mint flavor seems too subtle, don’t add more extract (which can taste artificial); instead, fold in extra finely chopped Andes mints right before pouring the batter.
Frequently Asked Questions
Can I make Mini Andes Mint Chocolate Cheesecake without a muffin tin?
Absolutely! Silicone molds work beautifully, or use 4-ounce ramekins for slightly larger individual servings. Just adjust baking time accordingly—ramekins may need an extra 5-7 minutes in the oven.
How do I prevent my mini cheesecakes from sticking to the pan?
Line muffin tins with paper liners or use silicone molds. For best results, lightly mist with cooking spray before adding the crust mixture, ensuring easy removal every time.
Can I substitute the Andes mints with another chocolate-mint candy?
Yes! Junior Mints, mint chocolate chips, or even crushed peppermint patties work well. Each creates a slightly different flavor profile, but all deliver that delicious chocolate-mint combination.
Why did my cheesecake filling curdle?
Overmixing or using cold ingredients often causes curdling. Ensure all ingredients are at room temperature and mix on low speed just until combined for a perfectly smooth texture.
How can I tell when my Mini Andes Mint Chocolate Cheesecakes are done baking?
The edges should be set but the centers should still have a slight jiggle—similar to Jell-O. They’ll continue cooking from residual heat and firm up as they cool.
Final Thoughts
These Mini Andes Mint Chocolate Cheesecakes have become my signature dessert for good reason—they’re the perfect balance of sophisticated flavor and nostalgic comfort. There’s something magical about watching people’s faces light up with that first bite, as the creamy chocolate and cool mint create a moment of pure joy. I hope you’ll give these little treasures a try and perhaps start your own tradition with them. Don’t forget to share your creations on Pinterest and tag me—I absolutely love seeing your versions of this beloved recipe!