
Desserts
Cannoli Cheesecake Bars Recipe That Will Blow Your Taste Buds!
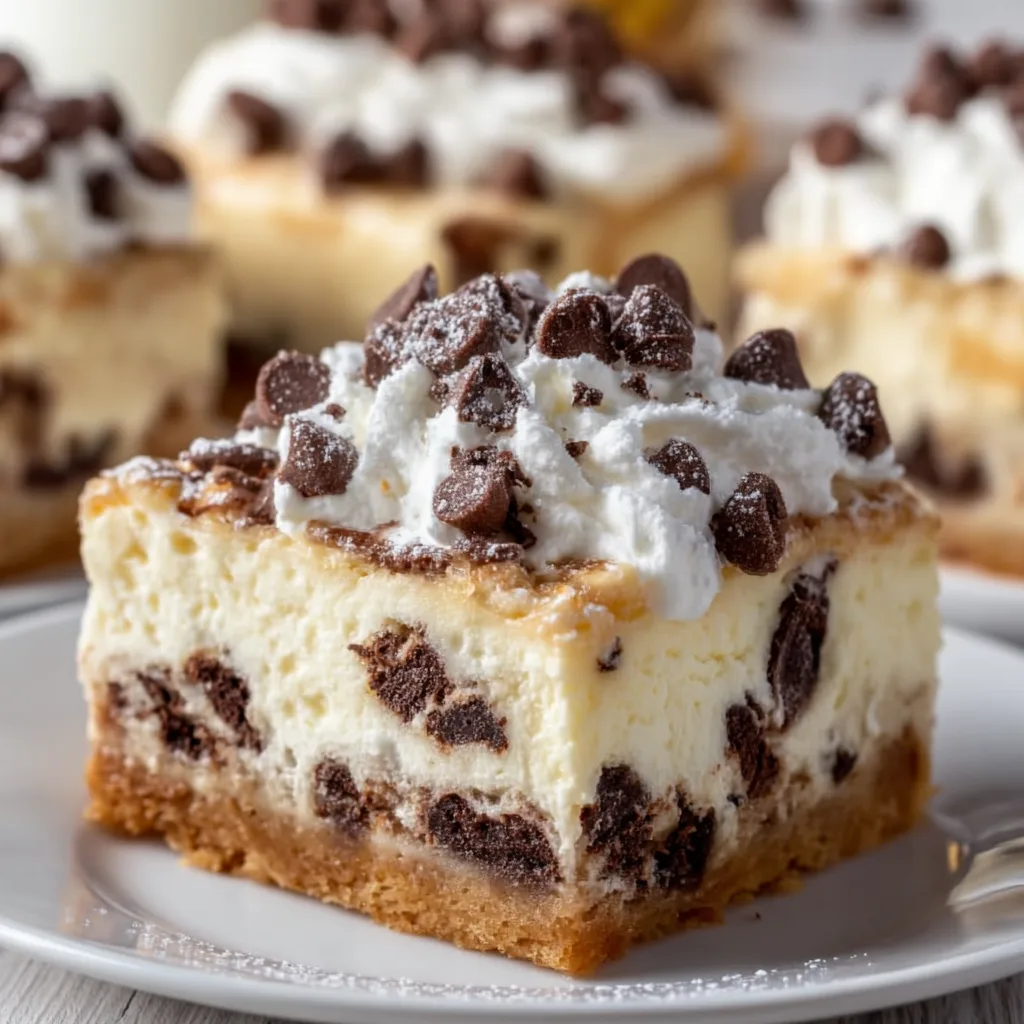
Cannoli Cheesecake Bars blend two of my favorite desserts into one irresistible treat that’s easier than making traditional cannoli but just as delicious. The buttery graham cracker crust cradles a creamy cheesecake filling studded with mini chocolate chips and hints of orange zest, all topped with a sprinkle of crushed pistachios. I first made these for my sister’s birthday gathering, and they disappeared faster than any dessert I’ve ever served! If you love the classic Italian pastry but want something more approachable to make at home, these bars are your answer.
Recipe
Why You’ll Love These Cannoli Cheesecake Bars
Perfect Balance of Textures and Flavors
These Cannoli Cheesecake Bars offer the perfect harmony between crisp and creamy elements. The graham cracker base provides that satisfying crunch that contrasts beautifully with the silky cheesecake layer. What makes these truly special is how the ricotta cheese lightens the texture while maintaining richness. The mini chocolate chips add little bursts of sweetness throughout, while the subtle notes of orange zest and cinnamon create that authentic cannoli flavor profile. I love how each bite manages to capture the essence of a freshly filled cannoli but in a more substantial, satisfying form.
Make-Ahead Convenience
One thing I absolutely adore about these Cannoli Cheesecake Bars is their make-ahead potential. Unlike traditional cannoli that need to be filled just before serving to maintain their crisp shells, these bars actually benefit from chilling overnight. This makes them perfect for entertaining or holiday gatherings when you’re juggling multiple dishes. I often prepare them the day before a family dinner, which not only saves me time but actually improves the flavor as the spices have time to meld together. The bars slice more cleanly when properly chilled, giving you those picture-perfect squares that look like they came from a bakery.
Essential Tips & Tricks
Perfecting the Cheese Mixture
The secret to achieving that authentic cannoli flavor lies in the cheese blend. While some recipes use all cream cheese, incorporating ricotta gives you that traditional cannoli filling texture. Make sure to drain your ricotta in a fine-mesh sieve lined with cheesecloth for at least 2 hours (or overnight in the refrigerator) to remove excess moisture. Room temperature ingredients are absolutely essential here—cold cream cheese will leave you with lumps no matter how long you mix. I learned this the hard way during my first attempt! For the most vibrant flavor, don’t skip the orange zest and vanilla—they’re subtle but make all the difference.
Avoiding Common Pitfalls
The most common issue with cheesecake bars is overbaking, which leads to cracks and a dry texture. Look for a slight jiggle in the center—the bars will continue to set as they cool. Another trick I’ve learned is to run a thin knife around the edges immediately after removing from the oven, which prevents the bars from sticking to the pan as they contract during cooling. For the cleanest cuts, chill the bars completely (at least 4 hours), then use a sharp knife dipped in hot water and wiped clean between each slice. This simple technique gives you bakery-worthy presentation every time.
Serving Ideas & Creative Variations
Elegant Presentation Options
Transform these Cannoli Cheesecake Bars from casual to company-worthy with a few simple touches. For a dinner party, I like to cut them into smaller, bite-sized squares and dust them with powdered sugar just before serving. For an extra special presentation, place each square in a mini cupcake liner and arrange on a tiered stand. A light drizzle of melted chocolate creates beautiful contrast against the creamy filling. During the holidays, I sometimes add a small dollop of whipped cream and a candied orange peel garnish. These little details elevate the bars without requiring much additional effort but make guests feel truly special.
Seasonal and Dietary Adaptations
These Cannoli Cheesecake Bars are wonderfully versatile and can be adapted for different preferences and occasions. For a summer variation, fold in fresh berries instead of chocolate chips, or try a lemon zest version for brightness. During fall, I love adding pumpkin spice and a bit of pumpkin puree for a seasonal twist. For gluten-free guests, simply substitute the graham cracker crust with crushed gluten-free cookies or nuts. To make a lighter version, use Neufchâtel cheese instead of full-fat cream cheese and part-skim ricotta. The basic recipe serves as a perfect canvas for creativity while maintaining that classic cannoli essence.
Storage & Troubleshooting Guide
Proper Storage Methods
Cannoli Cheesecake Bars need to be refrigerated due to their dairy content. They’ll keep beautifully in an airtight container for up to 5 days, though the crust may soften slightly over time. For the best texture, I recommend consuming them within 3 days of baking. If you want to prepare further in advance, these bars freeze exceptionally well. Simply wrap individual portions in plastic wrap, then aluminum foil, and freeze for up to 3 months. To thaw, transfer to the refrigerator overnight rather than using the microwave, which can make the texture uneven. The mini chocolate chips actually help preserve the texture during freezing and thawing.
Fixing Common Issues
If your Cannoli Cheesecake Bars develop cracks during baking, don’t worry! This is purely cosmetic and won’t affect the taste. Simply cover with a thin layer of sweetened whipped cream or a dusting of powdered sugar before serving. If your crust seems too crumbly when cutting, it likely needed more butter or wasn’t compacted firmly enough before baking. For future batches, use the bottom of a measuring cup to really press the crust mixture into the pan. If your filling seems too wet, the ricotta probably wasn’t drained sufficiently. Next time, let it drain longer or gently press out excess moisture with paper towels.
Frequently Asked Questions
Can I use mascarpone instead of ricotta in Cannoli Cheesecake Bars?
Yes! Mascarpone creates a creamier, richer texture. Blend it with the cream cheese as directed, but you won’t need to drain it like ricotta. The flavor will be slightly different but equally delicious.
How do I know when the bars are done baking?
Look for set edges with a slight jiggle in the center. The bars will continue firming up as they cool. Overbaking leads to cracks and dry texture, so it’s better to slightly underbake than overbake.
Can these be made without a springform pan?
Absolutely! Line a regular 9×9 baking dish with parchment paper with overhang on all sides. After chilling, lift the entire dessert out using the paper handles before cutting.
My filling seems lumpy—how can I fix it?
Ensure all ingredients are at room temperature before mixing. If you still have lumps, press the mixture through a fine-mesh sieve before adding chocolate chips.
What’s the best way to incorporate traditional cannoli shells into these bars?
For a fun twist, crush cannoli shells and mix with the graham crackers for your crust. You can also sprinkle crushed shells on top just before serving for added crunch.
Final Thoughts
These Cannoli Cheesecake Bars have become my go-to dessert when I want to impress without spending hours in the kitchen. They capture all the beloved flavors of traditional cannoli in a convenient, shareable format that’s perfect for gatherings or simple family desserts. The balance of creamy filling, chocolate, and that hint of citrus creates something truly special that keeps people coming back for seconds. I hope you’ll give these bars a try and experience the joy of bringing a bit of Italian bakery magic into your home. Don’t forget to check out more of my favorite dessert recipes on Pinterest!