
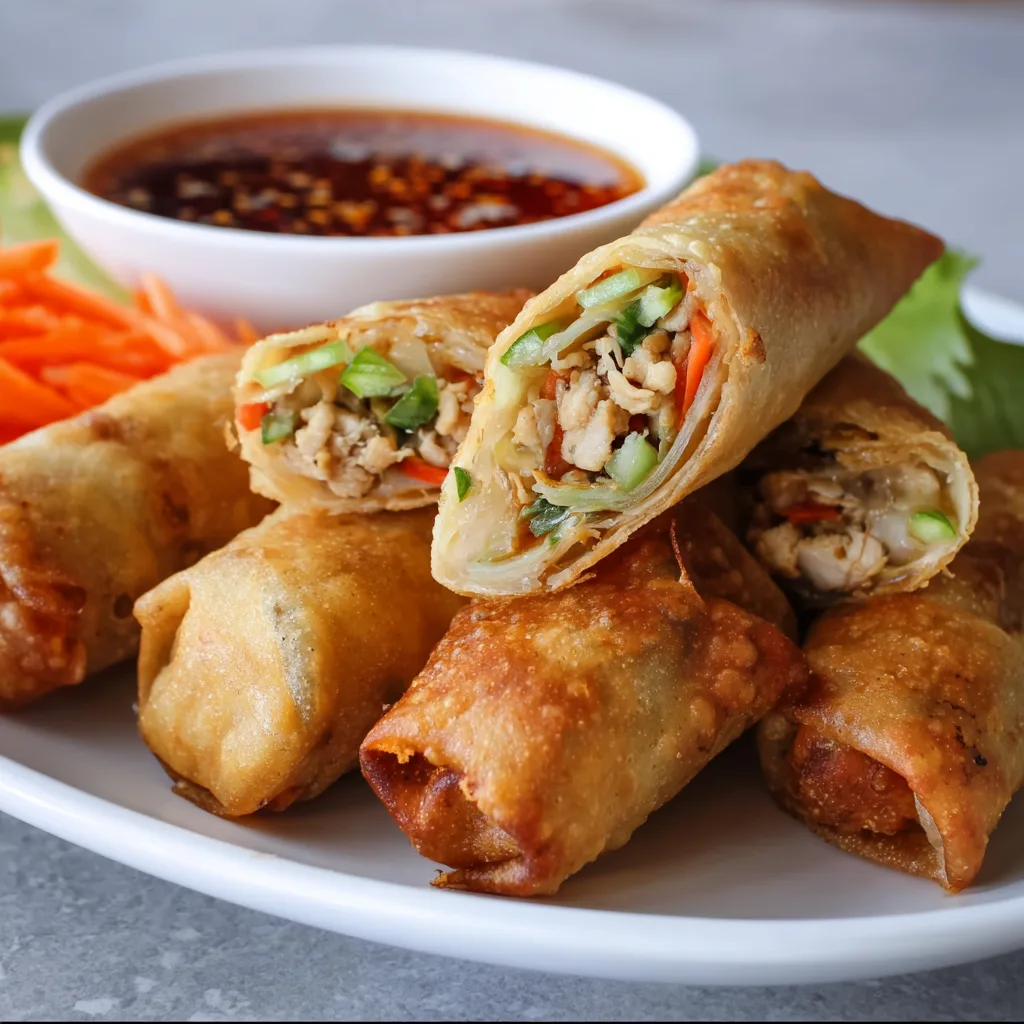
Crispy Homemade Chicken Spring Rolls are the ultimate crowd-pleaser that brings restaurant-quality appetizers right to your kitchen. The moment that golden, crackling wrapper meets your lips, releasing a burst of savory chicken and vegetable filling – pure magic! I discovered my love for making these at home during a rainy weekend when takeout wasn’t an option. Now they’ve become my go-to for everything from casual family dinners to fancy gatherings. The best part? You can customize them endlessly while mastering a technique that will make you feel like a culinary rock star. Let’s dive into this irresistible recipe!
Table of Contents
Recipe
Print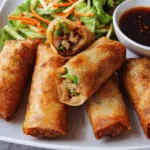
Crispy Homemade Chicken Spring Rolls
- Total Time: 35 minutes
- Yield: 12–15 rolls
Description
These crispy homemade chicken spring rolls are loaded with juicy ground chicken, shredded veggies, and bold Asian flavors—wrapped and fried to golden, crunchy perfection.
Ingredients
**Filling:**
1 tbsp oil
1 lb ground chicken
2 cloves garlic, minced
1 tsp grated ginger
1 cup shredded carrots
1 cup shredded cabbage or coleslaw mix
2 green onions, chopped
2 tbsp soy sauce
1 tbsp oyster sauce or hoisin
1 tsp sesame oil
Salt and pepper to taste
**Assembly:**
12–15 spring roll wrappers
1 egg, beaten (for sealing)
Oil for frying
**Optional for serving:**
Sweet chili sauce, soy sauce, or sriracha mayo
Instructions
1. Heat 1 tbsp oil in a large skillet. Add garlic and ginger, sauté for 1 minute.
2. Add ground chicken, cook until browned and cooked through. Season with salt and pepper.
3. Add shredded carrots, cabbage, and green onions. Cook 2–3 minutes until veggies soften.
4. Stir in soy sauce, oyster sauce, and sesame oil. Cook another minute, then remove from heat. Let cool slightly.
5. Lay a wrapper with a corner facing you. Add 2 tbsp filling near the bottom.
6. Fold bottom over filling, then sides, then roll tightly. Brush top edge with egg to seal. Repeat with remaining wrappers.
7. Heat 2 inches of oil in a pan to 350°F (175°C). Fry spring rolls in batches 3–4 minutes until golden and crisp. Drain on paper towels.
8. Serve hot with dipping sauce of choice.
Notes
• Use pre-shredded coleslaw mix to save time.
• Don’t overfill the rolls—too much can lead to bursting.
• Air fryer option: brush with oil and air fry at 400°F for 8–10 minutes, flipping halfway.
• Freeze before frying for easy meal prep. Fry directly from frozen, adding 1–2 minutes to cook time.
- Prep Time: 20 minutes
- Cook Time: 15 minutes
- Category: Appetizer
- Method: Frying
- Cuisine: Asian-Inspired
Why You’ll Love These Crispy Homemade Chicken Spring Rolls
Perfect Texture Combination
The contrast of textures is what makes these spring rolls absolutely irresistible. The wrappers transform into a shatteringly crisp shell while protecting the juicy, tender chicken filling inside. I love hearing that distinctive crunch when someone takes their first bite! The vegetables maintain just enough bite to add freshness and structure. When you achieve that perfect golden-brown exterior – not too dark, not too pale – you’ll feel a little surge of pride. Trust me, that moment when you slice one open to reveal the colorful filling is pure kitchen satisfaction.
Make-Ahead Convenience
These spring rolls are a meal-prep dream come true. You can prepare the filling up to two days ahead and store it in the refrigerator, making assembly a breeze when you’re ready. I often roll them all in the morning, refrigerate them covered with a damp paper towel, then fry just before serving. The uncooked rolls even freeze beautifully for up to three months – just add an extra minute to the cooking time. This flexibility has saved me countless times when unexpected guests arrive or when I’m too exhausted to start cooking from scratch.
Essential Tips & Tricks
Wrapper Mastery
Handling spring roll wrappers requires a gentle touch and a few key techniques. Always keep unused wrappers covered with a damp cloth to prevent them from drying out and cracking. When rolling, fold firmly but not too tight – you want to avoid tearing while ensuring no air pockets remain that could cause them to burst during frying. I learned the hard way that overstuffing leads to disaster! For the perfect seal, dab a little beaten egg or cornstarch slurry along the final edge. This creates a foolproof bond that won’t unravel in hot oil, giving you that professional finish every time.
Oil Temperature Control
The secret to perfectly crispy spring rolls without greasiness lies in maintaining the right oil temperature. Use a thermometer to keep your oil between 350-375°F (175-190°C). Too cool, and they’ll absorb excess oil and become soggy; too hot, and they’ll brown before the filling cooks through. Work in small batches – overcrowding the pan causes temperature drops. I always test with one roll first, adjusting as needed. After frying, drain them on a wire rack set over paper towels, not directly on paper, which traps steam and softens that beautiful crisp exterior you worked so hard to achieve.
Serving Ideas & Creative Variations
Dipping Sauce Pairings
The right dipping sauce elevates these spring rolls from delicious to unforgettable. Classic sweet chili sauce offers the perfect balance of sweet and spicy, while a tangy nuoc cham (Vietnamese dipping sauce) brings bright citrus notes that cut through the richness. For something creamy, try a peanut sauce with a hint of lime and sriracha. I love setting up a little dipping station with 2-3 options in small bowls. My family’s favorite is a quick sauce I make with soy sauce, rice vinegar, a touch of honey, and toasted sesame oil. These sauces also pair beautifully with Asian Garlic Shrimp for a complete feast.
Filling Variations
While the classic chicken filling is fantastic, don’t be afraid to experiment with alternatives. Swap the chicken for ground pork with a touch of five-spice powder, or try shrimp chopped into small pieces with some minced lemongrass. For vegetarian options, crumbled tofu seasoned well works beautifully, as does a mushroom medley with glass noodles. Add unexpected elements like diced water chestnuts for crunch or kimchi for a spicy Korean twist. My personal favorite variation includes a bit of cream cheese mixed into the filling – it creates pockets of creamy richness that contrast wonderfully with the crisp exterior.
Storage & Troubleshooting Guide
Keeping Them Crispy
Maintaining that signature crispness is the biggest challenge with leftovers. For best results, cool completely before storing in a container lined with paper towels, with additional paper towels between layers. Refrigerate for up to 3 days. To reheat, avoid the microwave, which will make them soggy. Instead, place them on a wire rack in a 350°F (175°C) oven for 8-10 minutes until heated through and crisp again. If you’re serving them at a party, keep freshly fried rolls warm in a 200°F (95°C) oven on a wire rack, but serve within an hour for optimal texture.
Fixing Common Problems
Even experienced cooks encounter spring roll challenges. If your rolls are splitting during frying, your oil is likely too hot or you’ve overfilled them. If they’re browning unevenly, they may be touching in the pan – ensure they have space to float freely. Soggy rolls usually mean the oil temperature was too low or they weren’t drained properly. If your filling is watery, try pre-cooking vegetables longer to remove excess moisture and always cool filling completely before rolling. When wrappers tear during rolling, they’re either too dry (mist with water) or you’re handling them too roughly.
Frequently Asked Questions
Can I bake these Crispy Homemade Chicken Spring Rolls instead of frying?
Yes! Brush them lightly with oil and bake at 425°F (220°C) for 15-20 minutes, turning halfway through. They won’t be quite as crispy as fried, but still delicious with significantly less oil.
How do I prevent my spring rolls from becoming soggy?
Ensure your filling is cool and not watery before rolling. Drain cooked vegetables well and pat dry if needed. Fry at the correct temperature (350-375°F) and drain on a wire rack, not directly on paper towels.
Can I make these ahead for a party?
Absolutely! Roll them up to 24 hours ahead and refrigerate uncooked, covered with a damp cloth. You can also fry them 2-3 hours before serving and reheat in a 350°F oven for 8-10 minutes.
What’s the best oil for frying spring rolls?
Use a neutral oil with a high smoke point like vegetable, canola, or peanut oil. These oils won’t impart strong flavors and can withstand the high temperatures needed for crispy results.
How fine should I chop the filling ingredients?
Aim for small, uniform pieces (about ¼-inch dice) for even cooking and easy rolling. Large chunks can tear the wrapper and make rolling difficult.
Final Thoughts
These Crispy Homemade Chicken Spring Rolls have become my signature appetizer for good reason – they’re impressive yet approachable, and the process of making them is almost as enjoyable as eating them. There’s something deeply satisfying about creating these golden, crunchy parcels from scratch and watching friends’ faces light up at first bite. Whether you’re making them for a special occasion or a cozy night in, they bring that perfect blend of restaurant quality with homemade love. Be sure to check out more appetizer inspiration on Pinterest and prepare to add this recipe to your regular rotation!